Translate

Pages

Thursday, July 5, 2018

DIY Spray-foam Dress Form: Inexpensive, Lightweight, Height-adjustable, but Messy

I assume you're here for the how-to. Just three paragraphs of fluff and then we'll get to it.
Completed dress form at lowest height

Why a dress form? 

I've got reeeaaaally broad shoulders. As in, men's medium or large shirts fit me pretty well in that area. So finding stuff in Japan that fits me well is a challenge. Much easier to make my own clothes, and it's easier to make or alter my own clothes if I have a dress form to drape on. I actually have a personalized soft foam form back in the States, but the shipping cost was prohibitive. So, DIY to the rescue.
 

Why not just make a duct tape form? 

Duct tape isn't pinnable. It gets your pins all sticky. Paper tape works and doesn't get pins sticky, but I have a hard time sourcing it here and it requires wetting the paper and then waiting for it to dry while it's on your body. Both types are also difficult to put on a stand, and are easily malformed. Originally I thought I would make a tape form and fill it with foam and call it good, but I realized I really don't like the surface of the tape form (duct tape and paper tape have trouble staying smooth and they're prone to buckling). I decided that using the tape shell as a mold for the foam was the best option for solving all all of the issues in one go. Even though it's early days yet, it looks like it worked even better than I expected.
 

Time required

Probably 5 solid days, depending on how you work. I'm just assuming that you have to feed yourself and run errands and other essential things like that. The foam probably took 4 hours, with walk-away time during the curing process. I had to sand quite a bit of foam away afterward, which took about 2 hours. The cutting, fitting, trimming, and sewing by hand and machine took about 8 hours. Area prep and cleanup also take time. That doesn't add up to 5 days, but everything always takes longer than I think it will, so I figured I'd overestimate for once.
 

Total cost

Less than ¥10,000
 

Materials (top to bottom, plus a few extra I missed in the picture)

DIY dress form materials
  • Taped dress shell (old shirt, lots of duct tape, plastic wrap, friend to help)
  • Cardboard
  • Pillow
  • Old hanger (rigid, not flexible)
  • PVC pipe 2 meters long
  • Duct tape
  • Pipe that fits inside the PVC pipe, at least 1 meter long (2 is probably best)
  • Metal file
  • Sponge block (I didn't need this in the end)
  • Coping saw
  • Plastic ring that can be tightened, same diameter as the inside pipe
  • Long-sleeved gloves
  • Mask
  • Base
  • Socket and screws to attach the pipe to the base
  • Expanding spray foam
  • Power drill
Not pictured
  • Utility knife (also for cutting the foam)
  • Cardboard tube (from gift wrap, paper towel rolls, etc.)
  • Spray bottle filled with water
  • Kitchen plastic wrap
  • 3 meters of heavy fabric to cover the dress form
  • Curved needles for hand sewing
  • Strong thread
  • Bra that fits well, if you usually wear one
  • Cotton batting for quilts
  • Glue gun and glue sticks
     

Process (in brief)

So here's the gist. Fill a dress form shell with spray foam. After the foam cures, cut away the shell and use it to make the pattern for your dress form's cover. Pad or trim the cured foam to match your measurements, cover the foam lightly with quilter's batting, and put the cover on your dress form.
 

Process (detailed text, not enough pictures)

  1. Make a taped dress form that includes the neck and sleeves. If you haven't done this before, get a few how-to videos under your belt before you try it. For this case a duct tape form will be fine. I tried using brown craft paper because it was less than ¥100 per roll. The problem with it was that it didn't stick to itself well, and it didn't form well to curves. If I did it over again, I would use duct tape.
  2. Cut the form off of the body, straight up the back. You already know to be careful here.
  3. Create the inner skeleton. Take the wide diameter pipe and use the coping saw and the metal file to notch out a place for the hanger. Slip the hanger in and tape it in place with duct tape.
    Tube with notched-out area for hanger
    Slip the cardboard tubes over the hanger arms and tape them in place. This will help the dress form keep a rounded shape at the shoulders.
    Hanger taped to wide-diameter pipe, with cardboard tubes covering the arms
  4. Make the form's base. Attach the socket to the base using the drill and screws. Fit the smaller-diameter pipe into the socket. Add the screw collar to the pipe, somewhere near the bottom. You'll use this later to adjust your dress form's height.
  5. Prep your shell. Line the inside of your taped dress shell with two separate layers of plastic wrap. This will help the shell release from the finished foam. You'll reuse the shell to make a pattern for the dress form cover. Use plastic wrap to cover the neck hole. Cap the sleeve ends of the shell with cardboard and tape in place.
  6. Pad out your skeleton. Take the pillow and poke the pipe-hanger through it from the pillow's seam edge to the opposite edge. The pillow is key because it gives the foam room to expand, without bursting your dress shell. Place the pipe-hanger-pillow into the taped dress shell, fitting the hanger into the dress shell's shoulders. Center the hook in the shell's neck as best you can. You won't tape the dress shell's center back closed yet.
  7. Fill upper front torso with spray foam. Stuff starts happening quickly here. Have a spray bottle filled with water handy. The spray foam requires water to activate and cure, so you'll be using it frequently. Protect all surfaces where the foam might land. Do this project in a well-ventilated area.

    IMPORTANT: Do NOT touch wet foam because it sticks, then it makes long sticky strings, and then it sticks like superglue to whatever else it comes in contact with. Superglue cheese. Horribly messy stuff while it's wet. Instead, if it ended up somewhere you didn't want it, wait for it to dry, and then sand it off.

    Lay your shell down on its chest. Liberally spray the inner surface of the shell with water. Wearing your long gloves, mask, protective eye wear, and clothes you don't care about, follow the directions on the spray-foam container (shaking and all that good prep stuff). Squirt a couple test streams into the arms of one sleeve of the shell, just to get an idea of how much the foam will expand. Once you get comfortable with it, lift up the bottom end of the hanger-pipe and spray inside the sleeves and chest front, and down the torso. Lay the pipe down and spray into areas that will be hard to reach when the shell is taped closed (neck area, shoulders, upper torso). You might use an entire can here. Don't do the area below the torso yet. 
    Spray the foam with water immediately. Tape the dress shell closed. Let the foam harden.
  8. Spray foam the lower body. You'll probably be starting a new can of foam here. Same precautions as before. Prep with water. Spray foam into the bottom of the dress shell, trying hard to get it into all the nooks and crannies. Spray with water. You'll actually have to hold the form upside-down while you wait for it to cure enough that it's safe to lay it down or lean it against something. Allow to cure again.
  9. Check for unfilled areas. Once it is completely dry and cured, gently use your hands to press all over the dress form from the outside, searching for pockets that the foam didn't get to. If it's a hard-to-reach area, you have the option of poking a hole in the dress shell and applying foam that way. Just make sure you've sprayed the foam everywhere it needs to go. Spray with water. Again, allow to cure.
    Spray foam steps are finished! Also, I caught a big one!
  10. Remove tape shell from foam body. Once the foam is completely dry and cured, try to remove the tape shell from the foam form in one piece. Save the shell. Now it's time to make measurements. Measure at your waist, hips, and chest, then compare to the foam's measurements. If it's too big, use sandpaper, a utility knife, or the coping saw to reduce it (again, mask, safety glasses, well-ventilated area, etc.). If it's only a little too small, that's fine since we'll be using cotton batting to pad the form a little.
  11. Make the cover for the dress form. Take your taped shell from before and mark princess seams on the front and back of one side. Mark the side seams, keeping them perpendicular to the floor. Mark the shoulder seams. Mark the neck seams. Mark the armscye (where the arm meets the body, the sleeve seam). I also marked triangles on the seams to help me match points.

    IMPORTANT: You need to decide if you want to have a back center seam, or if you want to sew the sheath closed at the side seam. Having a back center seam makes it easier to do a fit-check, but it is a much longer seam to sew by hand than the side seam.
  12. Cut the shell into pattern pieces. Cut the marked seams. For symmetry, flip the cut side onto the uncut side (front and back, but not at the same time) and draw princess seams again. (If your body halves are not equal, draw the princess seams by hand instead of using the cut side as the pattern.) Mark and label all pieces, and cut out.
  13. Cut out your fabric. If your tape shell held together pretty well, you can use it as your pattern pieces. Lay them on your fabric, add seam allowance (be generous, in case you want to expand your form later), mark an label all pieces and cut out. If your shell suffered a lot, use it to make a test sheath first using inexpensive fabric like gingham. Adjust as necessary and make a new pattern, then continue on the form's fabric.
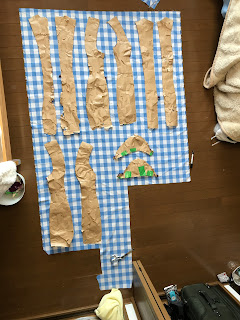
    Tape shell as pattern on gingham test fabric
  14. Apply a thin layer of batting to the form. Spray foam tends to shed. Minimize it with a layer of cotton batting between your foam and your cover. The batting should separate easily into very fine layers, so you have a lot of control over how thick or thin it is.
    Cotton batting, separated into thin layers
    Foam form with cotton batting applied
  15. If applicable, add a bra. Put the bra on your dress form, if you normally wear one. I forgot this step and really wish I hadn't. By the time I remembered, I'd sewn the cover on completely and I didn't want to undo it all.
  16. Sew the cover. If you have a center back seam, sew all pieces together and leave that seam open. Ease it onto your form and check the fit. Adjust as necessary.

    If you do not have a center back seam, sew all pieces except one side seam. Ease onto your dress form and check the fit. Adjust as necessary.
  17. Zipper or no zipper? Time to make a choice. You can either use a zipper to close your cover, or you can use a ladder stitch and finish it all by hand. A zipper is much faster for making adjustments, but it might get in the way during drapings and fittings. Sewing by hand can be awkward and time-consuming, but the result looks very professional and you have a lot of control over the fabric while you sew. Choose the one that works best for your situation and put the cover on your form.
    I chose to close my cover by hand at the side seam
  18. Make hole covers. The only thing left is to cover the visible holes for the arms, neck, and lower body. Use the form as a guide and trace the shape of the openings onto cardboard. With the same fabric you used for the form, cover the cardboard. Wrap the fabric up over the edges and glue to the wrong side of the cardboard with a glue gun.
  19. Cap the holes. Use a ladder stitch and strong thread to sew the cardboard covers onto the dress form cover. That's it! You're done!! You may want to cut the large-diameter pipe so that it ends close to your dress form. It will look better. Until I buy a longer base-pipe, I'm going to leave mine so it's not too wobbly.
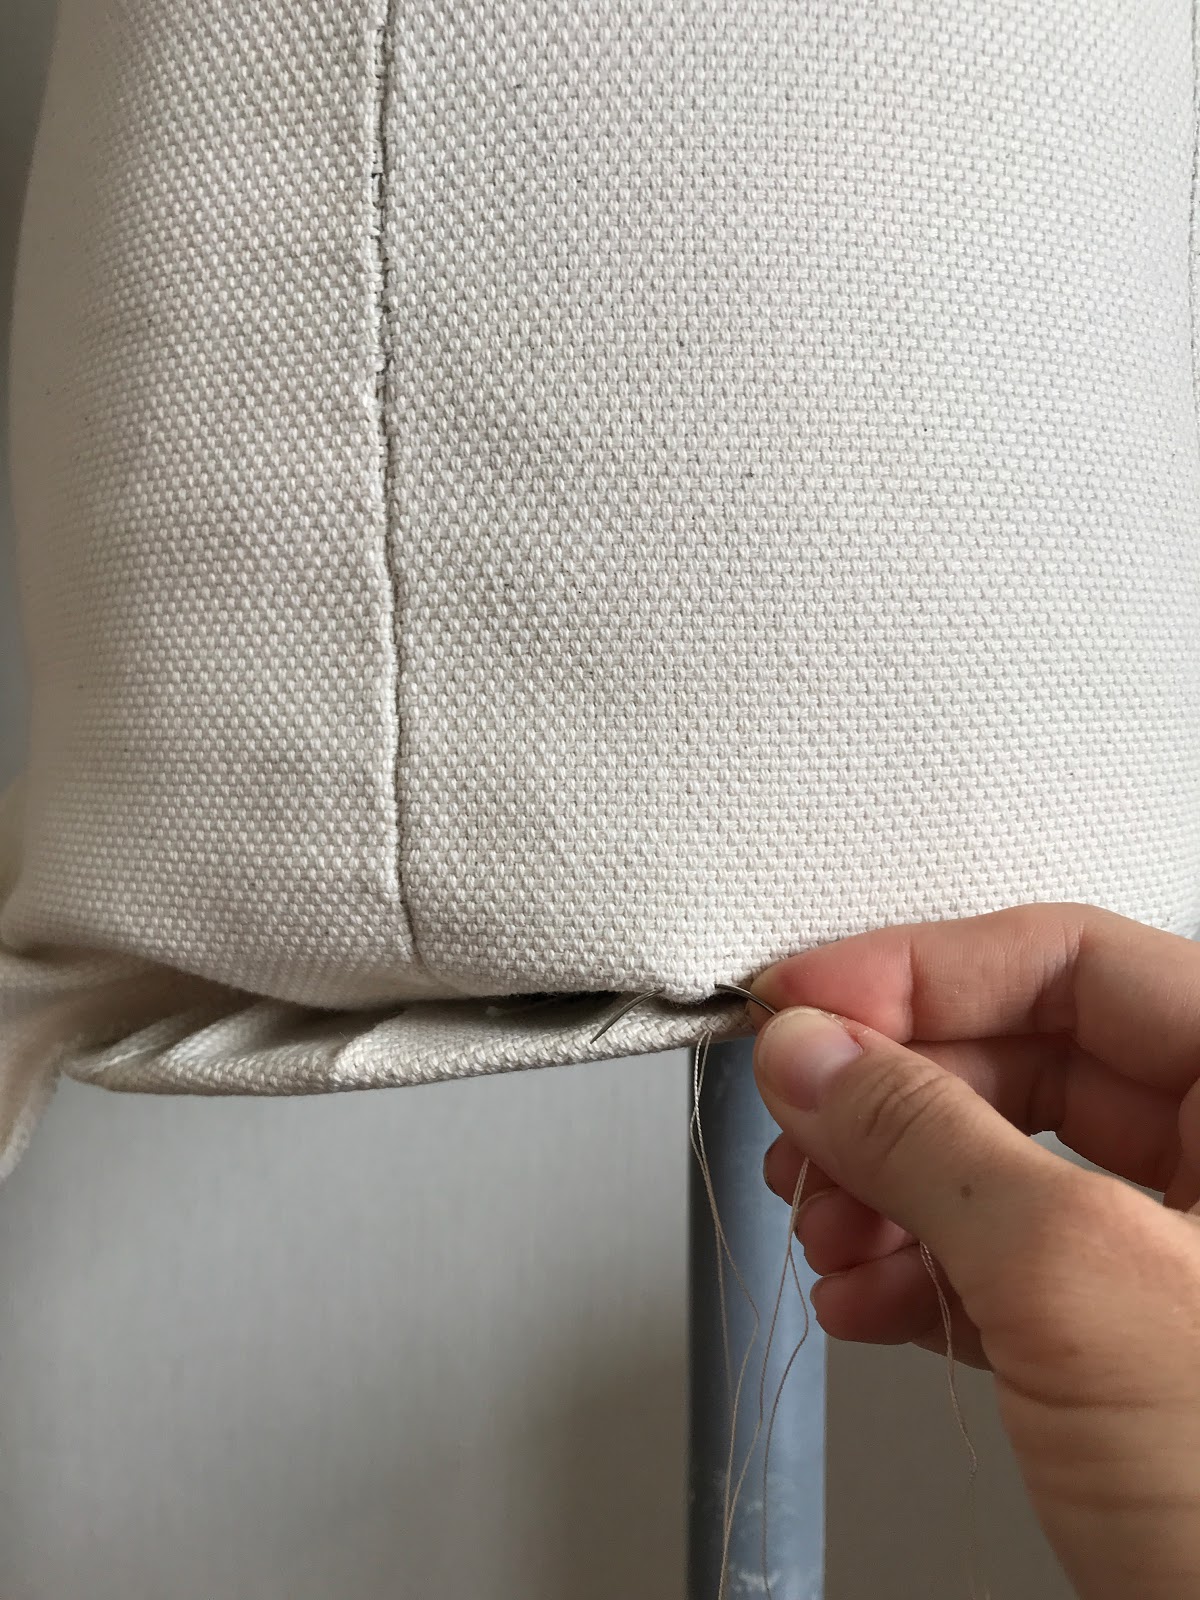
Sewing the cardboard cover on by hand, using a curved quilting needle and silk thread

Final thoughts 

Pros: the project met my goals. It was inexpensive, the supplies were easy to find at my local hardware store, I was able to complete it at home, and the finished product is sturdy, professional-looking, fits my body type, and I can use pins on it.

Cons: It was definitely messy. The spray foam squirted unexpectedly a few times, and even after a few washes it's still stuck to my old pants. Sanding and cutting the foam makes dust that gets everywhere, and it's staticky so it can be hard to remove. It also does take quite a bit of effort and time. 

So, what do you think? Did I skip any steps? Did I leave you with questions?

If you make this project, I hope you'll share the results here in the comments. Good luck!

Psst, here's the best part: it only weighs 2.5 kg!
So lightweight at 2.5 kg!

Monday, April 23, 2018

Ōsaka and Kyoto with kids. Day 5: Yodobashi and the Nozomi Shinkansen

Our Day

Checkout time for us was 10:00, and our Nozomi tickets were for just after 12:00. Our plan was to grab a quick breakfast in the train station, stuff our luggage in a locker, do some shopping in Yodobashi, then pick up our luggage and head to the Shinkansen. It almost went as planned, except we didn't realize how absolutely confusing Umeda and Osaka station were. 
Our daughter has adjusted so well to Japanese life that this is a perfectly acceptable breakfast to her!


Yodobashi

Yodobashi is a shopping center just across the street from Osaka Station. It has everything from clothes to electronics to toys, so we thought it would be a good place for our kids to spend the last of their money and pick up souvenirs. Again, we needed a little more time than we had, and our day probably would have been a little smoother if we skipped this step. 


Osaka Station

We headed back to the train station and this is where things got a bit crazy. My husband split off to get our luggage, and we agreed to meet at the entrance to the subway. What we didn't realize is that there were multiple ticket gates. I dashed to the information desk with my kids in tow, trying to get directions to the landmark my husband could see. They couldn't help us. We had to give up when we both realized we were wasting too much time, so I floundered my way through buying subway tickets for the first time (it's exactly the opposite from train tickets; you're supposed to put your money in first and then choose how much you want to pay, and buying mixed adult and child tickets is not as straightforward. I ended up having to buy each ticket separately), and we caught the next train out.

Happy ending: our family reunited at Shin-Ōsaka and we made it to the Nozomi with two minutes to spare. We were out of breath and so relieved! The rest of our trip back home was entirely uneventful. We all settled back to watch the movies we brought with us and enjoyed a quiet ride. Footsore but happy, our first trip to Ōsaka and Kyoto was behind us.

Ōsaka and Kyoto with kids. Day 4: Ōsaka

Quick Japanese Pronunciation Tip

Why do I keep writing "Ōsaka" with the bar over the O? The correct pronunciation in Japanese has you hold the O for two beats. Sounds weird if you do it in English. Sounds weird in Japanese if you don't.

Our Day

For our last day in Ōsaka we wanted to visit Ōsaka Castle, a cat cafe, and a children's science museum I read about online.
Google Maps tracked our day for us

Ōsaka Castle

Ōsaka Castle was easy to reach by train. We took the Ōsaka loop line and got off at Ōsaka Castle Station. It was a beautiful day and the cherry blossoms along the river were in full bloom.
Sightseeing barges offer a nice view of the cherry blossoms
Not too far inside the park we noticed a road train that would take us right to the castle, which sounded great since our feet were sore from all the walking over the past two days. The man who gave us our tickets spoke Japanese, English and Chinese and told us that the next train would leave in about half an hour, and we could get out of line if we wanted but seats were first-come-first-served. There weren't too many people around so took a few minutes to walk around and get some drinks, making sure to get back in plenty of time.
Choose to go to the castle or to another station
There are lots of different tour options at the castle. Many offer timed tickets so you can purchase now and have a guaranteed spot later, like the golden boat tours. We opted to guide ourselves since we couldn't stay very long if we still wanted to do the other things we had planned for the day.
Golden boat tours offer a unique view of the castle from the moat
It's difficult to get a sense of scale without people in the photo. Hi, little family!

It's easy to walk by this enormous rock, until you ask yourself how they got it there.
The castle grounds are wide and open, and attract entertainers and exotic animal handlers. We watched a juggling act, and came across a man with a hawk that was tame enough for the kids to touch!
Any day is made better with animals

Cat Cafe

We left the castle through the southwest exit, had lunch at Sukiya (a popular chain restaurant), and caught the subway to Nakazakicho, the station nearest the cat cafe we scouted out online. Neko No Jikan let us right in and had no issue with our kids interacting with the cats. Truthfully none of them were interested in being petted or playing, but as soon as we bought snacks for them they immediately changed their attitude.
Rough tongues tickle!

Suddenly decides he's a lap cat
One drink was included with our paid hour with the kitties, so I brewed a cup of Earl Grey and sat watching the outside world with the cats. The cafe overlooks a playground that has cherry trees and lots of birds. It was a nice way to spend a quiet few minutes.
Watching cherry blossoms fall and birds fly

Kids Plaza Osaka

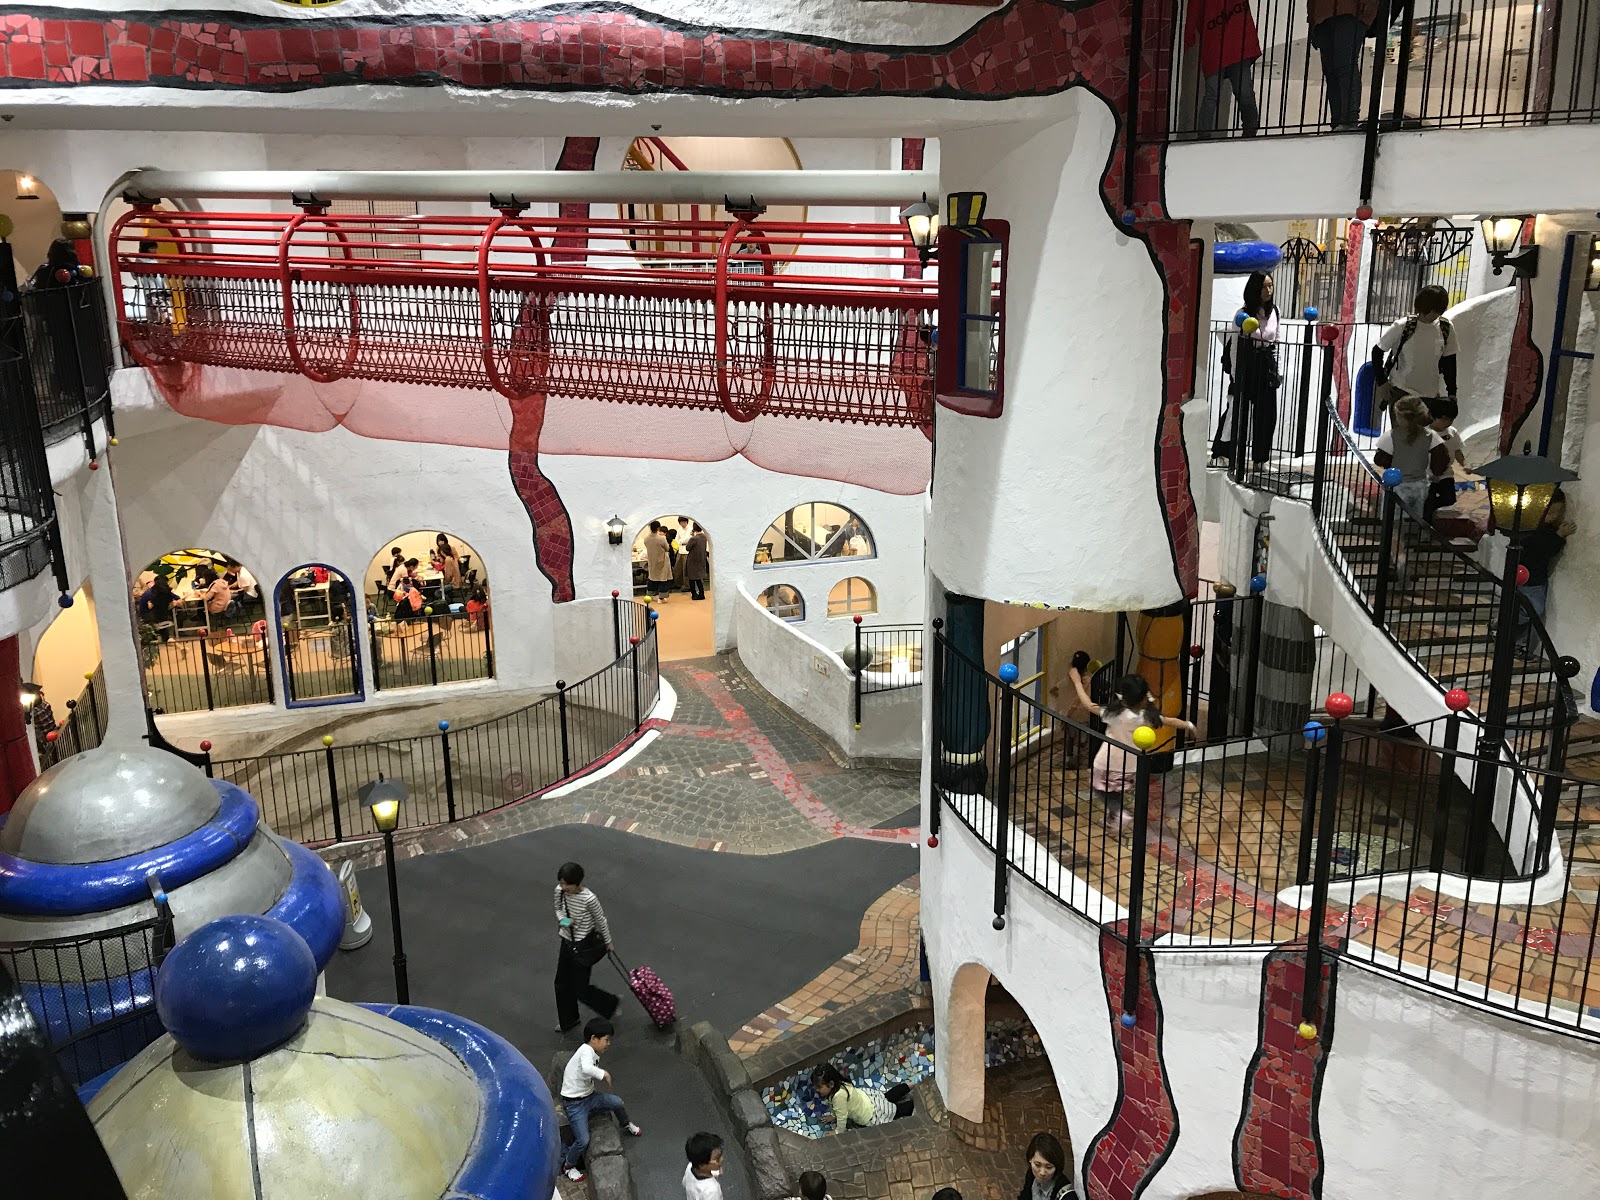
Once our hour with the kitties was up, we walked about 10 minutes to Kids Plaza Osaka. Check out the link (in English) to get a better sense of the place. I can't really do it justice here. I think kids from 2-12 will enjoy it the most, but there is so much to offer than really anyone can have a good time here. There are interactive displays, a huge indoor playground, plus lots of quieter areas too.
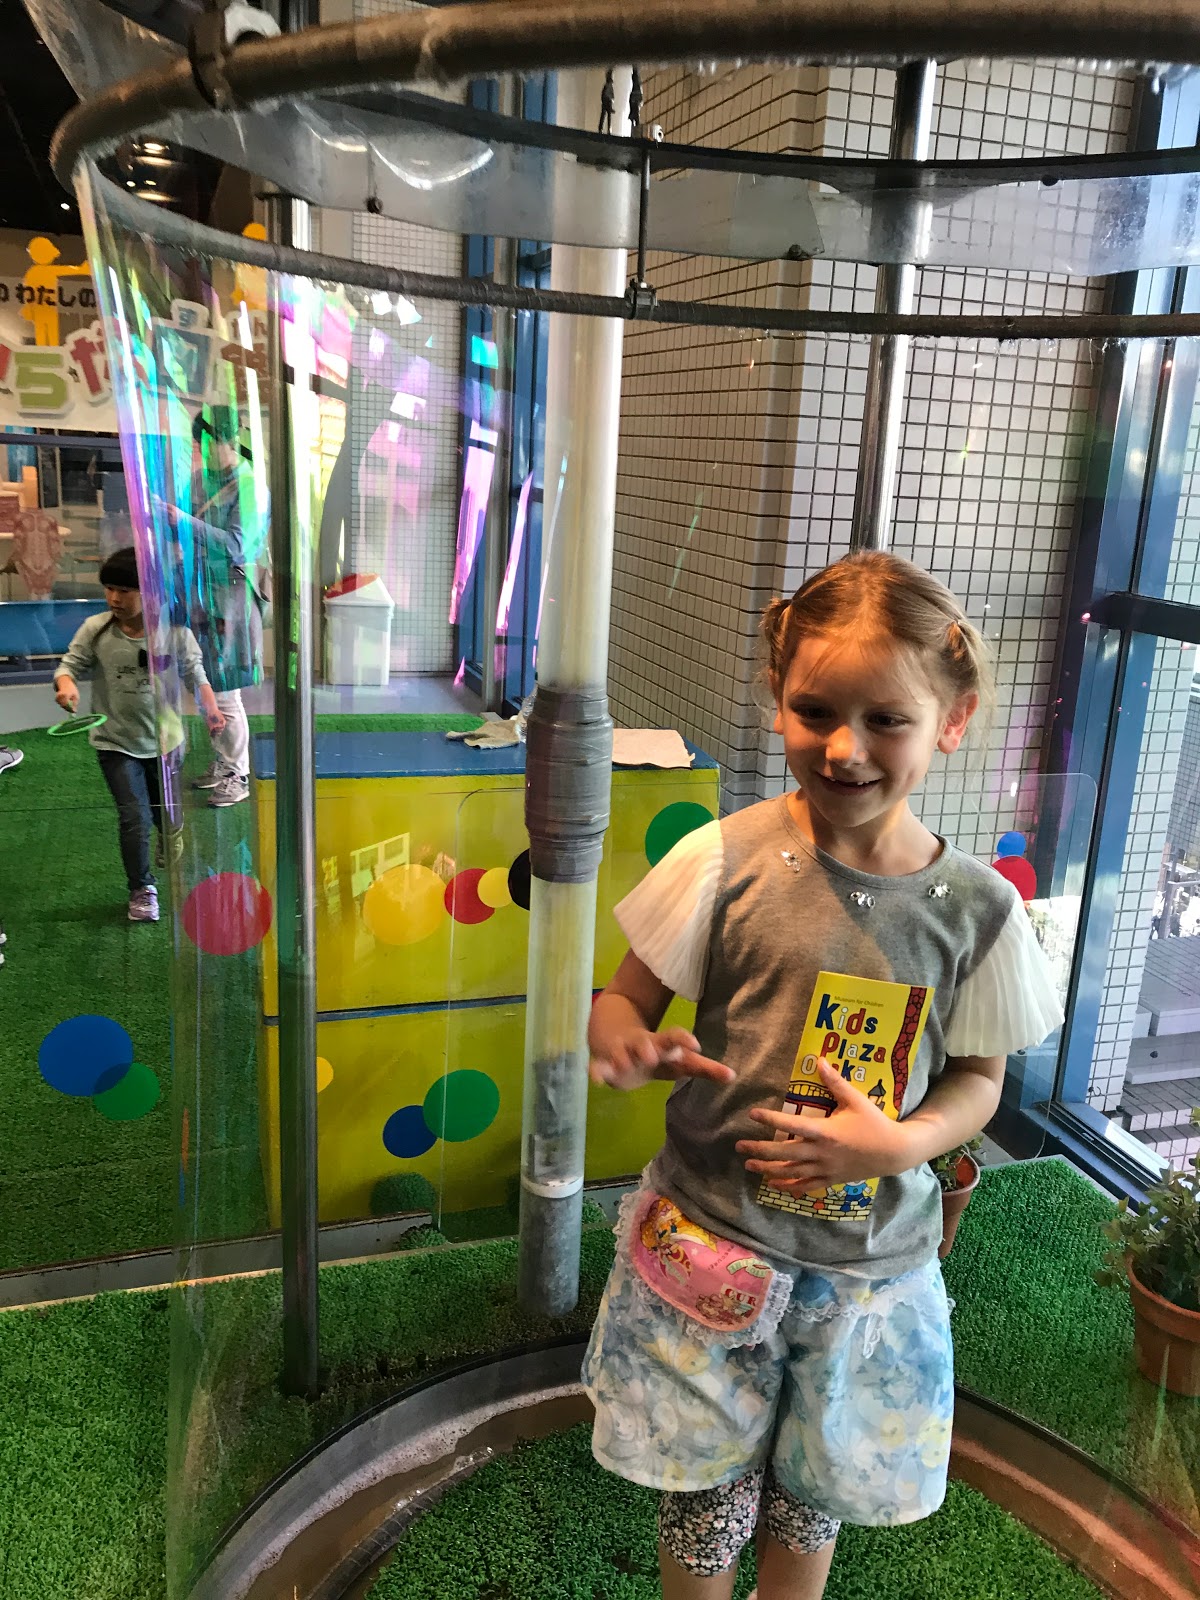
Bubble chamber
Just a note of caution: kids can quickly access other floors and rooms, and keeping them in sight at all times is nearly impossible. It's still a very safe area, and staff are visible and plentiful if you need help. Your best bet is to arrange a meeting spot because it's highly likely someone will get lost at some point.
Slide, climb, crawl, hang, go nuts. Lose your kids.

Try out musical instruments from all around the world.
We definitely wish we arrived here earlier because there was so much more that we wanted to see and do than we could in an hour. 3-5 hours would have been better, actually. We reluctantly left when the doors closed, and made our way back to our place for dinner and packing.

As we looked back on our trip we agreed that we all wish we had more time to spend, but that we were pretty satisfied with our itinerary and the things we got to see and do. Our mix of activities kept a good balance between things that were interesting for kids and things that the adults wanted to do. It was definitely a trip I would make again.

Wednesday, April 18, 2018

Ōsaka and Kyoto with kids. Day 3: Kyoto

Quick Kyoto Travel Tips

Train Stations

Google Maps does a wonderful job now of helping you get from point A to B with local and accurate train, subway and bus schedules. Kyoto is built on a grid system, so the tendency is for train stations to be grouped in pairs just a block or so away from each other, with one station servicing the east-west direction, and the other going north-south. If you glance around a train station and can't find the route you expect, check your map and see if there's another station nearby. Chances are you're at the wrong one.

A note about buses

If you think there's a remote possibility you will use the bus system, show your best tourist manners and purchase a day pass for around 600 yen from a train station or ticket machine before you board the bus. You can purchase a one-way fare for about 300 yen (one price no matter where you go in the city), instead. Either way, you really want the pass or ticket before you get on the bus because the buses stay packed from beginning to end, and it's infinitely better to flash your day pass or one-way ticket at the bus driver than to have to search for exact change and hold everything up.


Important info about Fushimi Inari Taisha

The path is open all year, day and night. This is a huge tourist destination, so avoid the peak hours of 9:00 to 6:00 if you want to miss the crowds. There are bathrooms and vending machines along the path, but only the bathrooms at the trailhead will be open after dark. The bathrooms have running water but no soap or towels. Also note that there are two train stations near the shrines, so double-check your map to ensure you head to the correct one. It took us 2 hours to hike the full trail, and we passed under 2,629 torii (there are more, but we didn't walk every path).

Our Day in Kyoto (Nishiki Market, Fushimi Inari Taisha)

With Universal Studios out of the way, we were ready for our day in Kyoto. We all slept well in our comfortable Air B&B so we woke bright-eyed and ready to catch our train. A few days before our trip we decided to book a food tour in Kyoto's Nishiki Market. The tour's website heavily stressed how important it was to arrive at the meeting spot on time. I'm really glad we allowed extra time for travel because when we checked our schedule with Google Maps, we discovered significant delays on the line we needed to use. The app helped us find an alternate route and we made it to the meeting spot with mere minutes to spare.

Nishiki Market Food Tour

Our guide was Jennifer with Arigato Japan Food Tours, which we found through TripAdvisor. Our group was small, with just our family and two people from Australia. We learned later in the crowded market how nice it is to have a small group! Jennifer did a wonderful job of guiding us through the market, dropping interesting historical facts and interacting with the vendors on our behalf.

We started our tour at Nishiki Tenmangū, a Shinto shrine. Thanks to Jennifer we learned about Kyoto's famously soft water, accessible at this shrine from a tap behind the purification area. The water really is deliciously cool and sweet. Bring your own water bottle and fill it up!
Tenmangū shrine. Bow slightly, toss a coin, ring the bell, bow deeply twice, clap twice, bow once more.

Nishiki market is between 300 and 700 years old, depending upon how you calculate it. Many of the shops have original old elements to them, and many of the shops have been owned by the same family for generations.   
Nishiki market, with it's distinctive roof

Aside from a variety of foods (from fish to beans, pickles to honey), there are clothing stores, shoe shops, and a very famous knife shop called Aritsugu that even sells left-handed knives.
Aritsugu. High prices, but artisan quality.

We were treated to plenty of samples on our tour. Jennifer did a great job of alternating between food and drink, so just as we started to get thirsty we were handed a nice cup of something.
Roasted flavored soy beans. Matcha usually isn't our favorite flavor, but these were delicious!
As a break from noshing on samples, our tour also included some more substantial seafood fare.
Octopus stuffed with a quail egg
The adults on our tour were able to enjoy samples of traditional Japanese sake. Higher-end shops will mark their entrance with a cedar ball like this one. Jennifer explained that the ball is made at the same time as a fresh batch of sake. The ball is green to begin with, but gradually turns brown over the course of a year. Sake is best when fresh and doesn't age well, so this cedar ball indicates older sake, and a new batch is probably on the way.
Brown cedar ball = older sake
Japanese cuisine tends to go easy on the spices, until they don't. 7-spice powder is often used in soup dishes. Less commonly known is a spice blend called biribiri in Kyoto, or piripiri in other parts of Japan. Piripiri means "numb" and this special spice blend (made from the berry-sized sichuan pepper) has an unusual numbing quality to it. Some blends are much more spicy than others, and you can sample them here. The one in the green package is my favorite. At first it's rather citrusy, then it transitions to very salty, and then your tongue begins to tingle and go a little numb. It's great on eggs, and I like to use it in Thai dishes. 
Stop by this shop for some interesting spice adventures
Random fact: Kyoto has laws to keep its city looking traditional. Not only are there limits to building height, there are color laws to follow. You won't see neon in Kyoto. I don't just mean the lights and signs, either. Safety equipment also follows the more subdued color scheme.
Safety cones can't be too bright in Kyoto. Vermilion is as crazy as they're allowed to get. 
Our tour of the market came to a close, and after all that food, it was time to eat! Our guide took us to a traditional Japanese restaurant called Umenohana (plum blossom). Tofu is a specialty in Kyoto and we were about to find out why. It turns out that soft water is the most important element to good tofu, so if you have tried it before and hated it, come to Kyoto and try it again. It's smoother, sweeter, creamier, and just plain delicious.
The starter for our 7-course meal. A tofu square with sweet yuzu-miso sauce, and a mixed salad.
After our lovely lunch we were set free from the tour. We returned to the market to browse through everything more thoroughly, and to purchase some of the items that caught our eye on our first time through. All in all, it was an interesting place for our family to visit. Even with a picky eater ("I don't like fish!") and a member with dairy restrictions, we all still really enjoyed ourselves and saw and tasted some very interesting things.
I don't know who can afford to pay $200 for dried sea cucumber, but it's not us.

Fushimi Inari Taisha

This is a pretty famous spot in Japan. If you've ever seen what looked like a tunnel of vermilion gates, you've seen this place. There are a wealth of famous places around Kyoto to pick from, but this one is open 24 hours a day and that fit well in our schedule. Plus, our kids just love to go up. There's a lot of up here.
One of many buildings at the base of the hill.
The path up the mountain is long and full of stairs of uneven height. Naturally our kids loved it. There are side paths and some alternate routes available, so get your bearings at the handy maps placed at the junctions and near the bathrooms. Did I mention it's a long hike? More than once we came to a new map and it looked like the "You Are Here" dot hadn't moved at all!
My son's face after hiking for 15 minutes, and the dot hasn't moved.
Our family loves animals, so we were lucky to be hiking when they fed the temple cats for the day (right around 6:30 p.m. if you're hoping for the same experience). There was only one who would let us approach, but that's all that our kids needed to make their day. We played "spot the cats" the rest of the way up the hill.
Nice kitty!
There was a very nice view of the city at the mountain's midpoint. We didn't linger too long because there was more up to go!
Kyoto by night
Thankfully the path is lit at night, but from the outside. Every gate casts deep shadows on the stairs, so tread carefully. Unless you're a kid, in which case you jump and slide as much as possible to maximize the fun. And scare your parents. Pro tip: there is a part of the path where you have to go up in order to go down. There are signs posted saying, yes, this really is the right way, so it's not just you. Trust the signs to guide you. You will reach the bottom again. Promise.
Our kids pausing under gate 1,894, I think...


Tuesday, April 17, 2018

Ōsaka and Kyoto with kids. Day 2: Universal Studios Japan

If you're reading this for Universal Studios Japan tips, your cheat sheet is coming up first. If you're reading this to vicariously experience our day through us, you can skip to the "Our Day" section.

Cheat sheet

Brief overview regarding tickets

Every ride at Universal Studios Japan has an express pass/ timed ticket line, and a regular line. The express pass is expensive, almost as much as the cost of admission. They're valid the entire day and for multiple trips on the same ride. Timed tickets are your cheaper option, but you have to seek them out, they're only valid for a certain time interval, and only once per ride. The timed ticket kiosks are in rather random locations (sometimes close to the ride, sometimes in another area entirely). Have all admission tickets for all wanna-be riders with you when you approach the kiosk. Park employees will be on hand to guide you through the options. You will have a list of time-spans to choose from. When your time comes, head to the ride and show your timed-tickets to be allowed through the short line. It will significantly cut your wait time. Popular rides often have wait times of 100 minutes, but toward the end of the day (even without an express pass or timed ticket) all but the most popular will have wait times around 45 minutes.

A word about Harry Potter 

To even enter the area, you have to wait in line as if it were a ride. You cannot enter the wizarding world at your whim, which means you can't even get to the shops or snacks or walk around inside unless you've passed through the entry point. We used a timed ticket to get in. After you get in, you'll have to wait in more lines if you want to ride any of the rides or take any of the tours. Even if you don't ride any of the rides there, it's still an incredible experience. The facades look amazing, the shops are full of interesting items, the snack carts are different from the rest of the park, and the area is full of things to see and do.
Entering the Wizarding World


Ride heights in the park 

Most commonly 122 cm and above is required. The milder rides require 92 cm and up. For the advanced rides you need to be at least 132 cm.

How scary are the rides

Some can be very scary. I don't recommend the Backdraft experience for young or sensitive children because there is a long sequence of very scary scenarios involving real fire and explosions. All of the rides in the Snoopy/ Hello Kitty area are fine, and the Wizarding World area and the Hippogriff ride are lots of fun for kids.
I was very impressed with the Backdraft experience, actually, but it was way too intense and frightening for my kids

The app

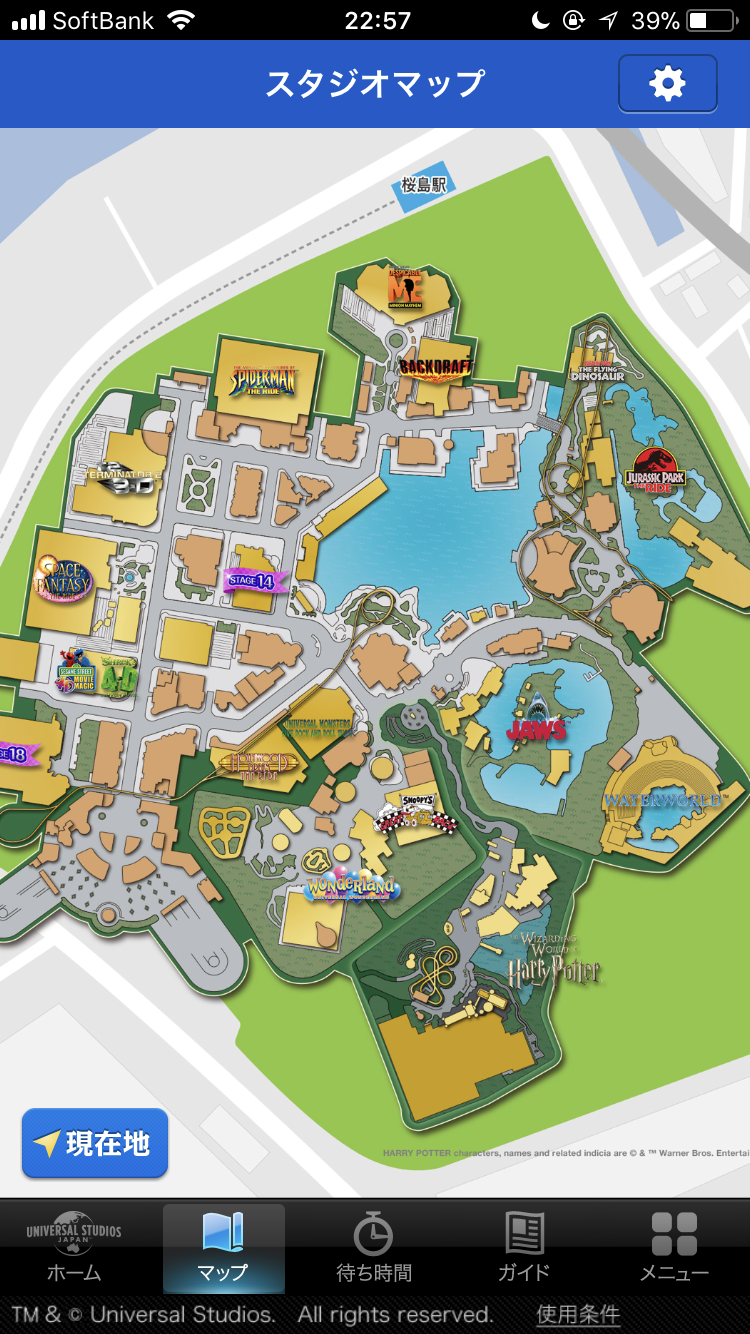
There is a Universal Studios Japan app that we did find helpful. If you can read katakana you will probably be able to navigate it just fine. (Katakana is relatively easy and can be learned with a few hours' practice, and what better motivation could you have?) When you are inside the park you can access wait times for all the rides, find your location relative to the rides you want to go on, see what time events and attractions are scheduled, find restaurants, and get height requirements for each ride.
Universal Studios Japan app for iPhone

Food

Restaurants, carts and kiosks are scattered all throughout the park. Popcorn and churros have the longest wait time. All of it is expensive. Technically you are not allowed (cough cough) to bring in your own food or drinks. Nobody checked our bags. Just sayin'.


Our Day

We wanted Universal Studios to be our first stop on our trip to get the anticipation over with for our kids. My husband and I aren't big theme-park fans because we don't like waiting so long in line for something that is over so quickly. It feels like we're spending money for the joy of waiting in line, which is stupid. Our kids are definitely on the opposite end of that spectrum, because they can divert themselves by pestering us about when we'll get to ride the rides, so they're fully entertained.
Wonderland, with Hello Kitty, Snoopy, Sesame Street, etc.

Even though we went on a Thursday, the park was packed and the lines were long (welcome to spring break in Japan). We arrived about 2 hours after the gates opened so that we could start the morning without alarm clocks and rushing. Our strategy was to take a relaxed approach to the day and hopefully hop on the popular rides just before the park closed for the day. By the end of the day the wait times did lessen by an appreciable amount, but not for all of the rides.

Wonderland

We used the Universal Studios Japan app to help us track wait times. Since the Wonderland area had the shortest waits, we headed there. Our son was embarrassed to no end when we wandered into Hello Kitty's Ribbon Collection. Some interesting fashions in there but it's mostly geared toward the most hardcore Hello Kitty fans. You get to meet Hello Kitty and have a picture taken (¥2000 for 2 pictures).

I knew we needed to get on some rides to appease the kids (it's what we came for, after all), so we spun ourselves silly on the Cupcake Dream ride.
Hello Kitty's Cupcake Dream was good fun for all of us
We rode the carousel next, and then we decided to try to find a bigger thrill. We wanted to go to the Harry Potter area, but we didn't realize that we needed to wait in line just to reach it. We decided a timed ticket would be better than waiting 80 minutes, so we tracked the ticket machines down, noted we had 2 hours to kill, and headed off for other entertainment.

Backdraft

While walking around we saw that Backdraft had a really short wait. I asked the attendant in Japanese if it was scary and she assured me it wasn't. Spoiler alert: it was. It really really was. It's not a ride, it's a show, but it's more than that. First they lull you with clips of explosions from well-known movies while you wait in line. Then you enter a room where you stand and listen to an introduction from Ron Howard (dubbed in Japanese). Our kids started to complain that they were bored, even though they could understand the Japanese better than we could. We were guided to a second room where they talked about explosions, gave us a brief safety warning, showed a clip from the movie that started to make our kids nervous, and then they lit a few things on fire. So far, not too impressive. Finally we were guided to a third room. Again a short safety reminder, and a quick minute later they started the fires. Just fake smoke and lighting effects at first, so we started to roll our eyes. Then some loud pops from fireworks and more smoke Okay, not great but not bad. Then a bigger explosion, more fireworks, more smoke, and that's when the pyrotechnics really got going. We could feel the heat from where we were standing, even though we were a good distance away. Flames billowed out in a gravity-defying river from the back room. Smoke started to rise to the ceiling. Things on the set started to collapse and crash. I knew that everything was rigged and carefully controlled, but to a kid it looks like mortal peril and chaos. I won't spoil the ending for you, but it got scarier. Our kids were wrecks afterward, and it took a while to calm them down.

Family Shows

We hoped to balance our scary experience with something funny and silly, so we went to the Monster Rock and Roll show. Everybody had a good time with that one. The costumes and set were good, and all of the performers sang and danced well. It helped our kids feel better after having the pants scared off of them.

There was just enough time for one of the outdoor Minion shows. All in Japanese, and fun.
Minions singing, dancing, and changing costumes

Harry Potter

Then it was finally time for our main event: Harry Potter! We showed our Timed Ticket and went right in. Well, sort of. There's actually quite a long path to follow before you get to the Wizarding area.
Not exactly the Deathly Hallows
Once you're in that area, it's really quite impressive. All of the park employees are dressed in wizard robes and other costumes. The shops are all akilter and look like the movie set. Even better, they're filled with some really interesting merchandise.
Perfectly crooked
Zonko's Joke Shop
If you stop in Ollivanders, you can spend ¥5000 and purchase a "working" wand for yourself. All of the wands are the same price, but they look different. You can purchase wands used by different characters, from Snape to Harry Potter to Bellatrix Lestrange, or choose wands by what material they're made from. 
LOL, not the best pic of my husband, but check out those wands!
Choose a wand that has a spell map (available in Japanese or English), which shows you spell-casting areas inside the Wizarding World. There are also instructions for how to perform each spell. At each location a park "wizard" will guide you through the steps, and different effects will greet you depending on how well you cast your spell. 


Hogwarts Castle is especially well done
Finally, we got in line for a roller coaster. Flight of the Hippogriff only had a 45 minute wait by this time, which is quite short for this ride. It had just enough thrills to please both our kids, without being too scary. We rode one more time, and then it was time to head out for the day to beat the crowds. 
Getting a good look at Hagrid's hut as we wait in line for the Flight of the Hippogriff
If you're researching for your own trip, I hope this post is helpful. I tried to learn all I could before we went, but I still had a lot of questions. If we were to do it all again, I would find all the rides that allowed a timed entry and get our times locked in. Other queries, like "which rides are too scary for my kids" could only be answered from first-hand experience, unfortunately.

Lastly, try hitting the Mos Burger (outside of the Universal Studios park) on your way out if you have kids who like toys with their meal. Their toys have a high replayability factor and will make a nice souvenir of your trip!